


How to Make a Table in Microsoft Word?

Do you want to learn how to make a table in Microsoft Word? Tables are a great way to organize information in a document. They can be used to format text and create a visual representation of data. With Microsoft Word, you can easily create tables and customize them to fit your needs. In this article, we will discuss the steps to make a table in Microsoft Word. We will also explore the features that make Microsoft Word the perfect tool for creating tables. So, if you’re ready to learn how to make a table in Microsoft Word, keep reading!
Making a Table in Microsoft Word is easy. Here are the steps:
- Open a new Microsoft Word document
- Select the “Insert” tab at the top of the screen
- Select the “Table” option from the menu
- Choose how many rows and columns you want in your table
- Click “OK” to create your table
- Fill in your table with information
- You can adjust the columns and rows of your table by right-clicking on the table and selecting “Table Properties”
- You can also format the design of your table by selecting the “Design” tab after clicking the table
Introduction to Creating Tables in Microsoft Word
Microsoft Word is a powerful document creation tool that allows users to quickly and easily create tables. Tables can be used to organize data, present information in an easy-to-read format, and even add visual appeal to a document. In this article, we will discuss how to create a table in Microsoft Word. We will cover the different options available for creating tables, as well as tips for formatting and styling tables.
Creating a Table in Microsoft Word
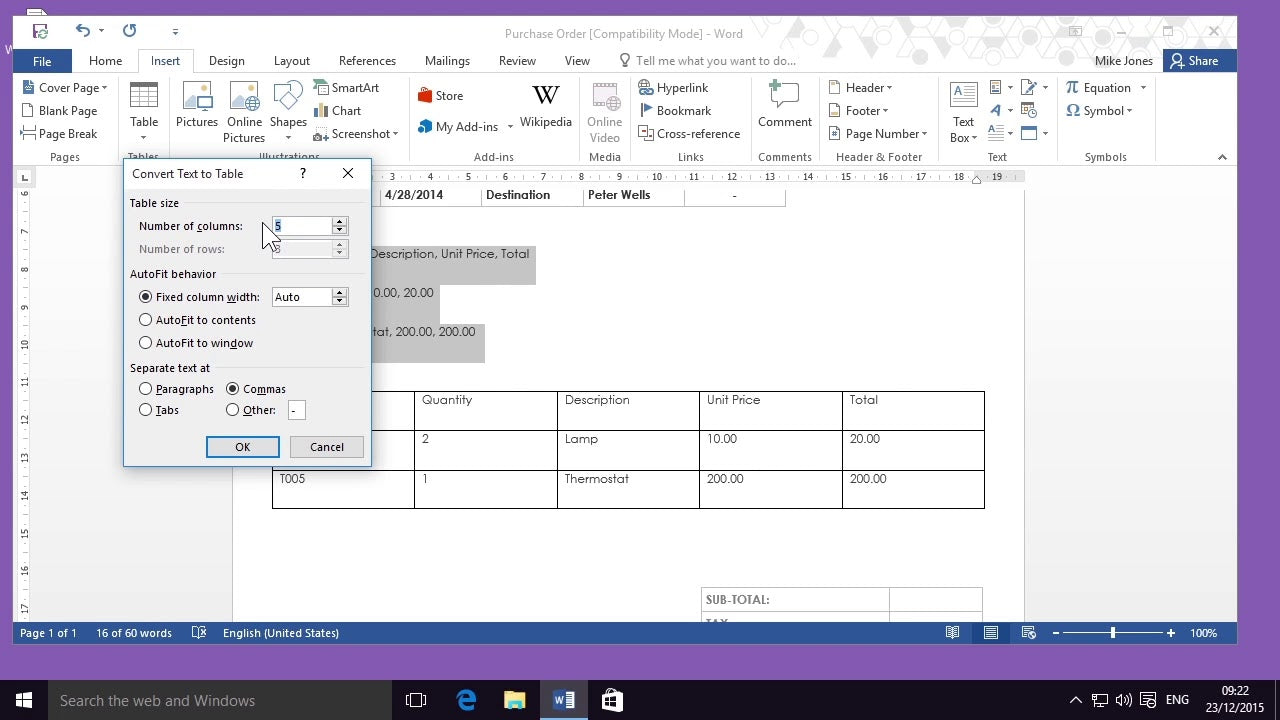
Creating a table in Microsoft Word is easy. First, open the Word document where you want to insert the table. From the Insert tab, click the Table button. This will open a dropdown menu with a variety of options for creating the table. You can choose to insert a table with a certain number of rows and columns, or you can draw a table with your cursor. You can also convert existing text into a table.
Once you’ve selected the table size and type, click OK and the table will be inserted into your document. You can then resize the table by dragging the handles at the edges of the table. You can also adjust the number of rows and columns by selecting the table and clicking the “Table Properties” button in the Table Tools tab.
Formatting and Styling Tables in Microsoft Word
Microsoft Word offers a variety of options for formatting and styling tables. To access these options, click the Table Tools tab and select the Table Styles dropdown. This will open a menu with a variety of preset table styles to choose from. You can also create your own custom styles by selecting the “New Table Style” option.
In the Table Tools tab, you can also access options for adding borders, shading, and text wrapping to your table. These options can be used to further customize the look of your table.
Adding Data to a Table in Microsoft Word
Once you’ve created and styled your table, you can add data to it. To enter data into a table, simply click on a cell and start typing. You can use the Tab key to move between cells, or you can use your mouse to click on a different cell. You can also add formulas to cells, which can be used to calculate data in the table.
Printing a Table in Microsoft Word
Once you’ve created and populated your table, you can print it. To print a table in Microsoft Word, go to the File tab and select Print. From the Print dialog, choose which pages of the document you want to print. You can also adjust the margins and page orientation for your table.
Saving a Table in Microsoft Word
When you’re finished creating and formatting your table in Microsoft Word, you can save it. To save a table in Microsoft Word, simply go to the File tab and select Save. You can also save the table as a PDF, which can be viewed and printed on any device.
Conclusion
Creating a table in Microsoft Word is easy and can be done in just a few simple steps. With the variety of options available for formatting and styling tables, you can create a professional and attractive table in no time. Once you’ve created the table, you can add data to it, print it, and even save it as a PDF.
Frequently Asked Questions
Question 1: How do I create a table in Microsoft Word?
Answer: To create a table in Microsoft Word, open the document and go to the Insert tab. Click on the Table button and select the size of the table you want to create. You can also draw a table by selecting the Draw Table option. Once you have created the table, you can customize it by adding or removing rows, columns, and borders. You can also add shading, formatting, and other design elements to the table to make it look more attractive.
Question 2: How do I merge cells in a table in Microsoft Word?
Answer: To merge cells in a table in Microsoft Word, first select the cells you want to merge. Then, right-click on one of the selected cells and select Merge Cells from the menu. This will merge the selected cells into one single cell. You can also use the Merge option from the Design tab to merge cells in a table.
Question 3: How do I add text to a table in Microsoft Word?
Answer: To add text to a table in Microsoft Word, simply click inside a cell and start typing. You can also select a cell or multiple cells and click on the Home tab. From the Home tab, you can format the text, add hyperlinks, and insert images. You can also change the alignment of the text or add shading to the cells.
Question 4: How do I adjust the size of a table in Microsoft Word?
Answer: To adjust the size of a table in Microsoft Word, first select the table by clicking on it. Then, you can use the selection handles to drag the edges of the table to make it bigger or smaller. You can also select the table and go to the Layout tab. From the Layout tab, you can specify the exact size of the table by entering the width and height in the Table Properties dialog box.
Question 5: How do I add a border to a table in Microsoft Word?
Answer: To add a border to a table in Microsoft Word, first select the table by clicking on it. Then, go to the Design tab and click on the Borders button. You can then select the type of border you want to add from the drop-down menu. You can also customize the border by selecting the color, thickness, and other design elements.
Question 6: How do I format a table in Microsoft Word?
Answer: To format a table in Microsoft Word, select the table by clicking on it. Then, go to the Design tab and select a style from the Table Styles group. You can also customize the color and design elements of the table by selecting the Table Styles Options button. Additionally, you can use the Shading, Borders, and Alignment options to further customize the formatting of the table.
Creating a table in Word
Making a table in Microsoft Word is a simple task that requires minimal effort. With the right tools, anyone can create a professional-looking table in no time. By following the steps outlined in this article, you can quickly and easily create a polished table in Microsoft Word. With a few clicks, you’ll be able to organize your data and present it in a visually appealing way. With a little practice, you can become a master at creating tables in Microsoft Word.


