


How to Drag Cells in Excel?

If you’re looking to become an Excel master, learning how to drag cells is a key skill you need to develop. It’s a simple but powerful tool that makes working with spreadsheets easy and efficient. Dragging cells allows you to quickly copy and move data from one cell to another, saving you time and effort. In this article, we’ll discuss how to drag cells in Excel, as well as some of its more advanced uses. With a bit of practice and patience, you’ll soon be dragging cells like a pro!
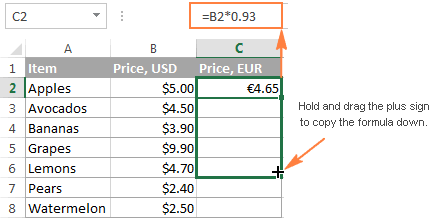
To drag cells in Excel:
- Select the cells you wish to move.
- Hover the mouse over the selection.
- When the cursor changes to a black plus sign, click and hold the left mouse button.
- Drag the selection to the desired location.
- Release the mouse button when you reach the desired location.
How to Select and Drag Cells in Excel?
Selecting and dragging cells in Excel allows you to quickly and easily move data around your spreadsheet. With this function, you can rearrange columns and rows, or even insert new pieces of data into the mix. Learning how to drag cells in Excel is easy to do and can help you save time when managing your spreadsheet data.
Step 1: Select the Cells to Drag
The first step in dragging cells in Excel is to select the cells you want to move. To do this, you can simply click and drag your mouse over the cells you wish to select. You can also select multiple cells with the keyboard. To do this, press and hold the ‘Shift’ key while using the arrow keys to select the cells you wish to drag.
Step 2: Move the Cells
Once you have selected the cells you wish to drag, you can move them by clicking and dragging the cells. You can click and drag the cells to any location in your spreadsheet. As you drag the cells, a blue box will appear to indicate where the cells will be placed when you release the mouse button.
Step 3: Resize the Cells
When you drag the cells, you can also resize them. To do this, you should click and drag the edge of the selection box. This will cause the cells to expand or shrink as you drag. You can also resize the cells by entering new values into the ‘Row Height’ and ‘Column Width’ boxes in the ‘Home’ tab of the ribbon.
Step 4: Copy the Cells
If you want to keep the original cells in the same location, you can also copy and drag the cells. To do this, you should press and hold the ‘Ctrl’ key while dragging the cells. This will create a copy of the cells in the new location and leave the original cells in their original location.
Step 5: Insert Cells
If you want to insert new cells into your spreadsheet, you can do this by dragging the cells. To do this, you should click and drag the selection box to where you want to insert the new cells. When you release the mouse button, the cells will be inserted into the spreadsheet.
Frequently Asked Questions
What is Dragging Cells in Excel?
Dragging cells in Excel is a feature that allows users to quickly copy or move data from one cell to another. It works by selecting a cell and then dragging it to a new location on the spreadsheet. This is a great tool for quickly copying and moving data around, and can save a lot of time compared to manually inputting the same data.
How Do I Drag Cells in Excel?
To drag cells in Excel, first select the cell or group of cells you want to move. Then, click and hold the left mouse button and drag the cell to the desired location. To copy the cell, press the Ctrl key and hold it down while dragging the cell. Finally, release the mouse button to complete the action.
What is the Difference Between Dragging and Moving Cells?
The difference between dragging and moving cells in Excel is that dragging will copy the data from the original cell and move it to the new location, while moving will delete the data from the original cell and move it to the new location. When dragging cells, it is important to remember to press the Ctrl key to ensure the data is copied.
Can I Drag Cells Across Different Worksheets?
Yes, you can drag cells across different worksheets in Excel. To do this, first select the cell or group of cells you want to move. Then, click and hold the left mouse button and drag the cell to the desired location in the other worksheet. To copy the cell, press the Ctrl key and hold it down while dragging the cell. Finally, release the mouse button to complete the action.
Can I Drag Cells Across Different Workbooks?
No, you cannot drag cells across different workbooks in Excel. To move data from one workbook to another, you must first copy the data from the original workbook and then paste it into the destination workbook. This can be done by selecting the cell or group of cells you want to copy, then pressing the Ctrl+C keys to copy the data. Then, open the destination workbook and select the desired location for the data. Finally, press the Ctrl+V keys to paste the data into the new workbook.
What Are the Limitations of Dragging Cells?
One of the main limitations of dragging cells in Excel is that it can only be used to move or copy data within the same spreadsheet. It cannot be used to move data between different spreadsheets or workbooks. Additionally, dragging cells can only be used to move or copy data; it cannot be used to delete or edit data.
Excel is a powerful tool that can help you manage and organize data. By understanding the basics of how to drag cells in Excel, you can quickly and easily make changes to your data. Whether you’re updating a spreadsheet, creating a chart, or simply moving data around, the drag-and-drop feature in Excel will help you get the job done quickly and efficiently. So, take advantage of this invaluable tool and start dragging cells in Excel today!


