


How To Change Footer In Powerpoint Master Slide?

Are you looking for a way to customize your PowerPoint presentations? Changing the footer of your PowerPoint Master Slide is a great way to personalize your slides and add a professional touch to your presentations. In this article, we will explore how to change the footer in your PowerPoint Master Slide and the various options available. You’ll learn how to add text, images, and even a logo to the footer, so you can create the perfect presentation. So, let’s get started!
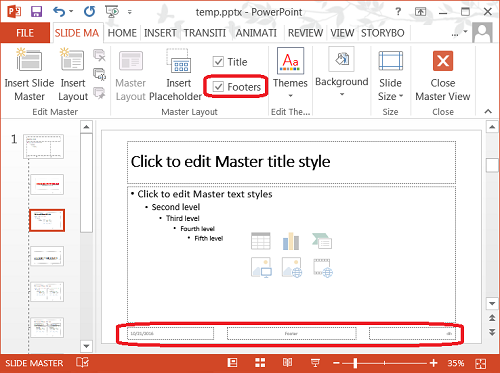
- Open PowerPoint and select the slide where you want to add the footer.
- Click on the Insert tab on the top of the page.
- Click on the Footer button on the right side of the window.
- Select the type of footer you want to add.
- Edit the footer by using text formatting options.
- Click on the Close Header and Footer button to save changes.
Modify Footer in Powerpoint Master Slide
Powerpoint master slides enable users to customize their presentation’s overall look and feel. It includes changing the footer, a small area at the bottom of each page containing additional information. The footer can be changed to include text, images, or other elements. In this article, we’ll discuss how to modify the footer in a Powerpoint master slide.
Create a Footer
To begin, open up the Powerpoint master slide you wish to modify. Select the “Insert” tab at the top of the page. From the drop-down menu, select “Text Box”. A text box will appear on the footer of the master slide. You can type in the text you would like to appear in the footer of your presentation. You can also resize the text box to fit the footer size.
Insert an Image
To insert an image into the footer, select the “Insert” tab from the top of the page. From the drop-down menu, select “Pictures”. You can then select the image you wish to appear in the footer. Once the image is inserted, you can resize it to fit the footer size.
Format the Footer
Once you have created the footer, you can format it to further customize it. To do this, select the “Format” tab from the top of the page. From the drop-down menu, select “Footer”. This will open up a menu containing options for formatting the footer. You can change the font size, color, and alignment. You can also add a border or background color.
Save the Master Slide
Once you have modified the footer of the master slide, you need to save the changes. To do this, select the “File” tab from the top of the page. From the drop-down menu, select “Save”. You can choose to save the master slide as a new file or overwrite the existing one.
Apply the Master Slide
Finally, you need to apply the master slide to your presentation. To do this, select the “View” tab from the top of the page. From the drop-down menu, select “Slide Master”. This will display the master slide you have just modified. Select “Apply” and the master slide will be applied to your presentation.
Remove the Footer
If you wish to remove the footer from the master slide, select the “Format” tab from the top of the page. From the drop-down menu, select “Footer”. This will open up a menu containing options for formatting the footer. Select the “Remove” option and the footer will be removed from the master slide.
Conclusion
Modifying the footer of a Powerpoint master slide is an easy task. All you need to do is insert the text or image you wish to appear in the footer, format it, and save the master slide. Once the master slide has been saved, you can apply it to your presentation. If you wish to remove the footer, you can do so by selecting the “Remove” option.
Frequently Asked Questions
Question 1: What is a Master Slide?
Answer: A master slide is a template in PowerPoint that serves as the basis for all other slides in a presentation. It contains elements such as the background design, logo, footer, and text boxes. It is used to maintain a consistent look and feel across all slides. By editing the master slide, all slides in the presentation will be updated accordingly.
Question 2: How do I access the master slide in PowerPoint?
Answer: On the Home tab, click on the View tab and select Slide Master. This will open the master slide in PowerPoint, which can be accessed by clicking on the slide thumbnail in the left-hand panel. You can then make edits to the master slide, such as changing the background design, logo, and footer.
Question 3: How do I change the footer in the master slide?
Answer: To change the footer in the master slide, select the slide thumbnail in the left-hand panel and click on the Insert tab. In the Text group, click on Footer. This will open a window where you can type in the desired footer text. Once you’re done, click on the Apply to All button to save your changes.
Question 4: Can I add images to my footer?
Answer: Yes, you can add images to your footer. Select the slide thumbnail in the left-hand panel and click on the Insert tab. In the Images group, click on Picture. This will open a window where you can select the image you want to insert. Once you’ve selected the image, click on Insert to add it to the footer.
Question 5: Can I add my own custom text to the footer?
Answer: Yes, you can add your own custom text to the footer. Select the slide thumbnail in the left-hand panel and click on the Insert tab. In the Text group, click on Footer. This will open a window where you can type in the desired footer text. Once you’re done, click on the Apply to All button to save your changes.
Question 6: Can I change the font and font size of the footer text?
Answer: Yes, you can change the font and font size of the footer text. Select the slide thumbnail in the left-hand panel and click on the Insert tab. In the Text group, click on Footer. This will open a window where you can type in the desired footer text. Once you’re done, click on the Font button to open a dialog box where you can select the desired font and font size. Once you’ve chosen the font and font size, click on OK to save your changes.
PowerPoint Hacks I How to Edit Master Slide in Powerpoint (Change Logo, Header and Footer)
Changing the footer in Powerpoint Master Slide is an easy task that anyone can do. With a few steps, you can make sure all your slides have the appropriate footer, which will make your presentations look more professional. With this knowledge, you can now confidently create and modify your Powerpoint presentations with a custom footer of your own.


