


How to Take a Ss on Windows 7?

Are you ready to learn how to take screenshots on Windows 7? Taking screenshots is a great way to capture what is happening on your computer screen and share it with friends, family, and colleagues. In this guide, we’ll show you how to take screenshots on Windows 7, with step-by-step instructions and screenshots to make it easy. So if you’re ready to learn how to take a screenshot on Windows 7, let’s get started!
- Press the Print Screen key on your keyboard. This will take a screenshot of the entire screen and copy it to the clipboard.
- Open an image editing program. You can use Paint, which comes with Windows, or any other editing program.
- Press Ctrl+V to paste the screenshot from the clipboard into the image editing program.
- Crop the image to get the precise screenshot you want.
- Save the image to your computer.
Taking a Screen Shot on Windows 7
Taking a screen shot or a screen capture is a useful way to save an image of your computer screen. Windows 7 has a built-in tool that allows users to easily take a screen shot. This article will explain how to take a screen shot on a Windows 7 computer.
Step 1: Open the Window You Want to Capture
The first step to taking a screen shot on a Windows 7 computer is to open the window or image that you want to capture. This could be a web page, a document, or any other item that displays on the screen. Once you have opened the window, make sure it is arranged the way you want it in the image.
Step 2: Prepare the Screen
Before you take the screen shot, you should prepare the screen by hiding any unnecessary windows or applications. This will make the image look clearer and more professional. You can also adjust the size of the window and move the window around the screen to get the desired effect.
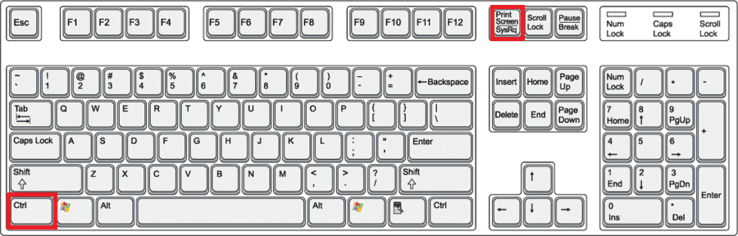
Step 3: Press the Print Screen Button
Once you have the window arranged the way you want it, you are ready to take the screen shot. To do this, press the Print Screen (PrtScn) button located on the keyboard. This will capture the image of the window and store it in the clipboard.
Step 4: Open the Paint Program
The next step is to open the Paint program. This can be found in the Start menu under All Programs > Accessories. Once the Paint program is open, press the Ctrl + V keys to paste the image from the clipboard. This will copy the image from the clipboard and display it in the Paint program.
Step 5: Save the Image
Once the image is in the Paint program, you can save it as an image file. To do this, click the File menu and select Save As. Select the type of image file you want to save the image as, such as JPEG or PNG, and then click Save. You can also adjust the size of the image, if necessary.
Step 6: Share the Image
The last step is to share the image with others. You can do this by emailing the image file or by uploading it to a website. You can also use the image in other applications, such as Word or PowerPoint.
Related Faq
What is the first step in taking a screenshot on Windows 7?
The first step in taking a screenshot on Windows 7 is to locate the “PrtScn” key on your keyboard. This key is normally located in the upper right-hand corner of the keyboard, and is typically labeled “PrtScn” or “PrntScrn.” Once you have located the key, press it to capture a screenshot of your entire screen.
How do I take a screenshot of a specific area?
In order to take a screenshot of a specific area, you will need to use the “Snipping Tool” program that is included in Windows 7. To open the program, go to the “Start” menu, and type “Snipping Tool” into the search bar. Once the program is open, you can use it to select the area of the screen that you would like to capture.
How do I save my screenshot?
Once you have taken a screenshot, you will need to save it in order to use it later. To save the screenshot, press the “Ctrl” and “S” keys at the same time. This will open a “Save As” window, where you can select the location and filename for the screenshot.
What file type should I save my screenshot as?
When saving your screenshot, you should save it in the PNG format. PNG is a lossless image format, which means that it will retain its quality and clarity even after it has been compressed. Additionally, PNG files are much smaller in size than other image formats, making them more suitable for sharing online.
How do I copy my screenshot to another computer?
If you need to copy your screenshot to another computer, there are several methods available. The simplest method is to email the screenshot as an attachment. You can also use a USB drive to transfer the image, or connect the two computers and use a file sharing program.
How can I edit my screenshot?
If you need to edit your screenshot, you can use a photo editing program such as Adobe Photoshop or GIMP. These programs allow you to crop, resize, and adjust the image in order to make it look the way you want. Alternatively, you can use a web-based image editor, such as Pixlr.
How to take a Screenshot!!! – How to do a Screenshot on Windows 7 – Free & Easy
Taking a screenshot on Windows 7 is an easy process that anyone can do. Once you have mastered this skill, you can use it to capture important documents, images, or conversations that you wish to keep for future reference. You can even use screenshots as a way to share information with others or to show off your latest project. So, now that you know how to take screenshots on Windows 7, you can keep your digital life organized, more efficient, and more enjoyable.


