


How To Create A Folder In Outlook For Specific Emails?
If you’re looking for a way to organize your Outlook emails, creating folders is an easy and effective solution. In this article, we’ll be discussing how to create folders in Outlook for specific emails so that you can easily manage and find the emails you need when you need them. We’ll go through the simple steps of setting up folders, so that you can start sorting through your emails in no time!
Creating a Folder in Outlook for Specific Emails:
- Open Microsoft Outlook and select the “Inbox” folder.
- Click the “Folder” tab in the main menu.
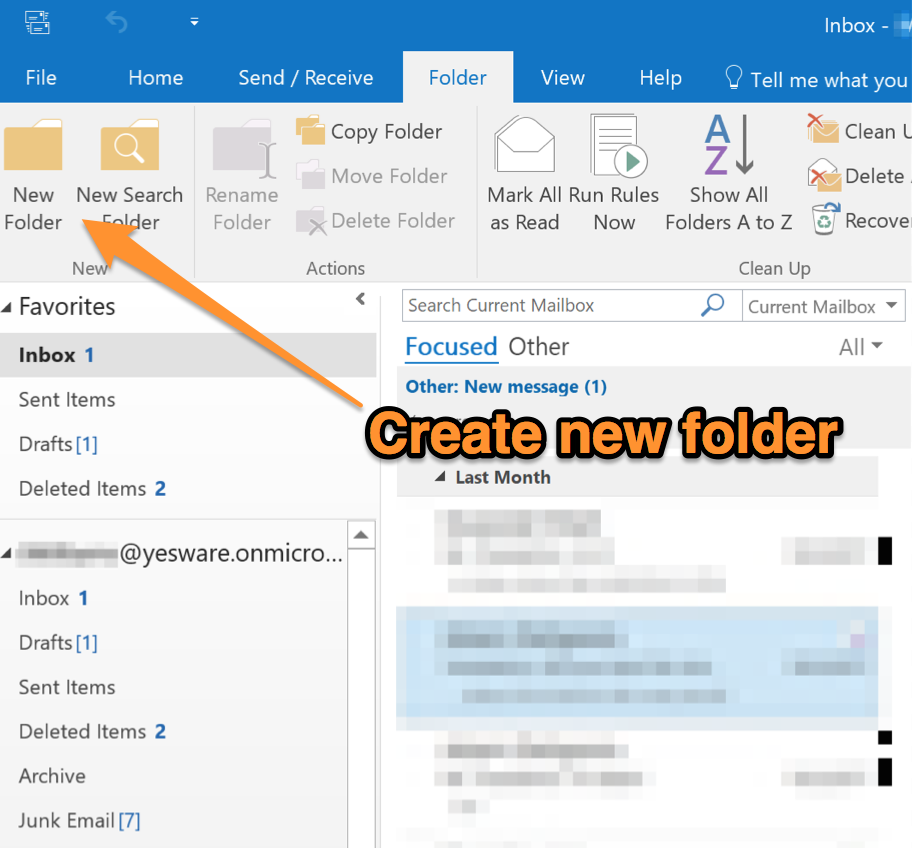
- Select “New Folder” from the drop-down menu.
- Choose a name for the folder and select where it will be stored.
- Click “OK” to create the folder.
- Go to the “Inbox” folder and select the emails you want to move.
- Drag and drop the selected emails into the previously created folder.
Creating a New Folder in Outlook for Specific Emails
Creating a folder in Outlook is a great way to stay organized and manage the large volume of emails you receive. Outlook allows you to create folders to store and organize emails. You can create folders for specific topics, projects, or even people. This article will provide step-by-step instructions on how to create a folder in Outlook for specific emails.
Step 1: Open Outlook
The first step to creating a folder in Outlook is to open the Outlook application. You can do this by going to the Start menu and selecting Outlook. Once Outlook is open, you will need to navigate to the folder view.
Step 2: Go to the Folder View
In the folder view, you will see a list of all the existing folders in your Outlook account. To create a new folder, you will need to select the “New Folder” option from the menu bar.
Step 3: Name the Folder
Once you have selected the “New Folder” option, you will be prompted to enter a name for the folder. You can choose any name you want, but it is recommended to use something descriptive and easy to remember. Once you have chosen a name for the folder, click “OK” to create the folder.
Step 4: Move Emails to the Folder
Now that you have created the folder, you can move specific emails into it. To do this, simply select the emails you want to move and drag them into the new folder. Alternatively, you can right-click on the emails and select “Move” and then select the folder you want to move them to.
Step 5: Managing the Folder
Once you have moved the emails into the folder, you can manage it by clicking on the folder. In the folder view, you will be able to view, delete, and organize the emails in the folder. You can also set up rules to automatically move emails into the folder by selecting the “Rules” option from the menu bar.
Step 6: Finalize the Folder
Once you have finished setting up the folder, you can click the “Save” button to finalize the folder. This will ensure that the folder and its contents are saved and you can access them at any time.
Conclusion
Creating a folder in Outlook is a great way to stay organized and manage the large volume of emails you receive. By following the steps outlined in this article, you can easily create a folder in Outlook for specific emails.
Related Faq
Q1. What is Outlook?
Answer: Outlook is a personal information manager from Microsoft that is part of the Microsoft Office suite. It is primarily used as an email application but also includes a calendar, task manager, contact manager, note taking, journal, and web browsing. It can be used as a stand-alone application, or can work with Microsoft Exchange Server and Microsoft SharePoint Server for multiple users in an organization, such as shared mailboxes and calendars, Exchange public folders, SharePoint lists, and meeting schedules.
Q2. What is the purpose of creating a folder in Outlook?
Answer: Creating a folder in Outlook is a way to organize emails and other items. It can help to keep emails and other items sorted and make it easier to find them later. It can also help to maintain privacy by allowing users to store emails and other items in a secure folder that only they can access.
Q3. How do I create a folder in Outlook?
Answer: To create a folder in Outlook, first select the folder that you want to create the new folder in. Right click on the folder and select “New Folder”. You will be prompted to name the folder and select whether it will be a mail folder, task folder, contact folder or other item. Once you have selected the type of folder, click “OK” to create the folder.
Q4. What are the steps to create a folder in Outlook for specific emails?
Answer: To create a folder in Outlook for specific emails, first create the folder as described above. Then select the emails that you want to move to the folder. Right click on the emails and select “Move”. Select the folder that you want to move the emails to and click “OK”. The emails will be moved to the new folder.
Q5. How do I organize emails in Outlook?
Answer: To organize emails in Outlook, use the folders created in Outlook. Move emails to the appropriate folders to keep them organized. You can also use the search bar to find emails quickly in Outlook. You can also use the “Categorize” feature in Outlook to add color coded labels to emails to make them easier to find.
Q6. How do I delete a folder in Outlook?
Answer: To delete a folder in Outlook, right click on the folder and select “Delete”. You will be prompted to confirm the deletion. Select “Yes” to delete the folder. Note that deleting a folder will also delete any emails or other items stored in the folder.
How to Create a Rule in Outlook to Always Move Emails from Inbox to Specific Folders | Outlook Tips
Creating a folder in Outlook is an easy way to manage specific emails and keep your inbox neat and organized. By following the steps outlined above, you can quickly and easily create a folder in Outlook that is tailored to your specific email needs. With this new folder, you can easily find emails, keep them organized and make sure that they don’t get lost in the chaos of your inbox. Now that you know how to create a folder in Outlook, you can easily keep your specific emails organized and make sure that you never miss an important message.


