


How To Create A Signature In Outlook 365?

Are you trying to figure out how to create a signature in Outlook 365? If so, you’ve come to the right place! In this guide, we’ll show you how to quickly and easily create a signature in Outlook 365, so you can start personalizing your emails with a professional-looking signature. You’ll learn how to create a signature from scratch, as well as how to customize the look and feel of your signature. Let’s get started!
1. Open Outlook 365 and select the File tab.
2. Select Options and in the window that appears, select Mail.
3. Under the Compose messages section, select the Signatures option.
4. Select New to create a new signature and give it a name.
5. In the Edit signature window, type or paste the signature text.
6. Select OK to save the signature.
7. To add images or logos, select the Insert picture option.
8. Select OK to save the signature and close the window.
9. To set the signature as the default signature, select the signature in the Select signature to edit box and check the box beside Automatically include my signature on messages I send.
10. Select OK to save the settings.
Create a Professional Signature in Outlook 365
Creating a professional signature in Outlook 365 is an easy way to ensure your emails look their best. A signature can include your name, your company, a logo, contact information, and even a profile picture. By following these steps, you can create a unique and professional signature in Outlook 365.
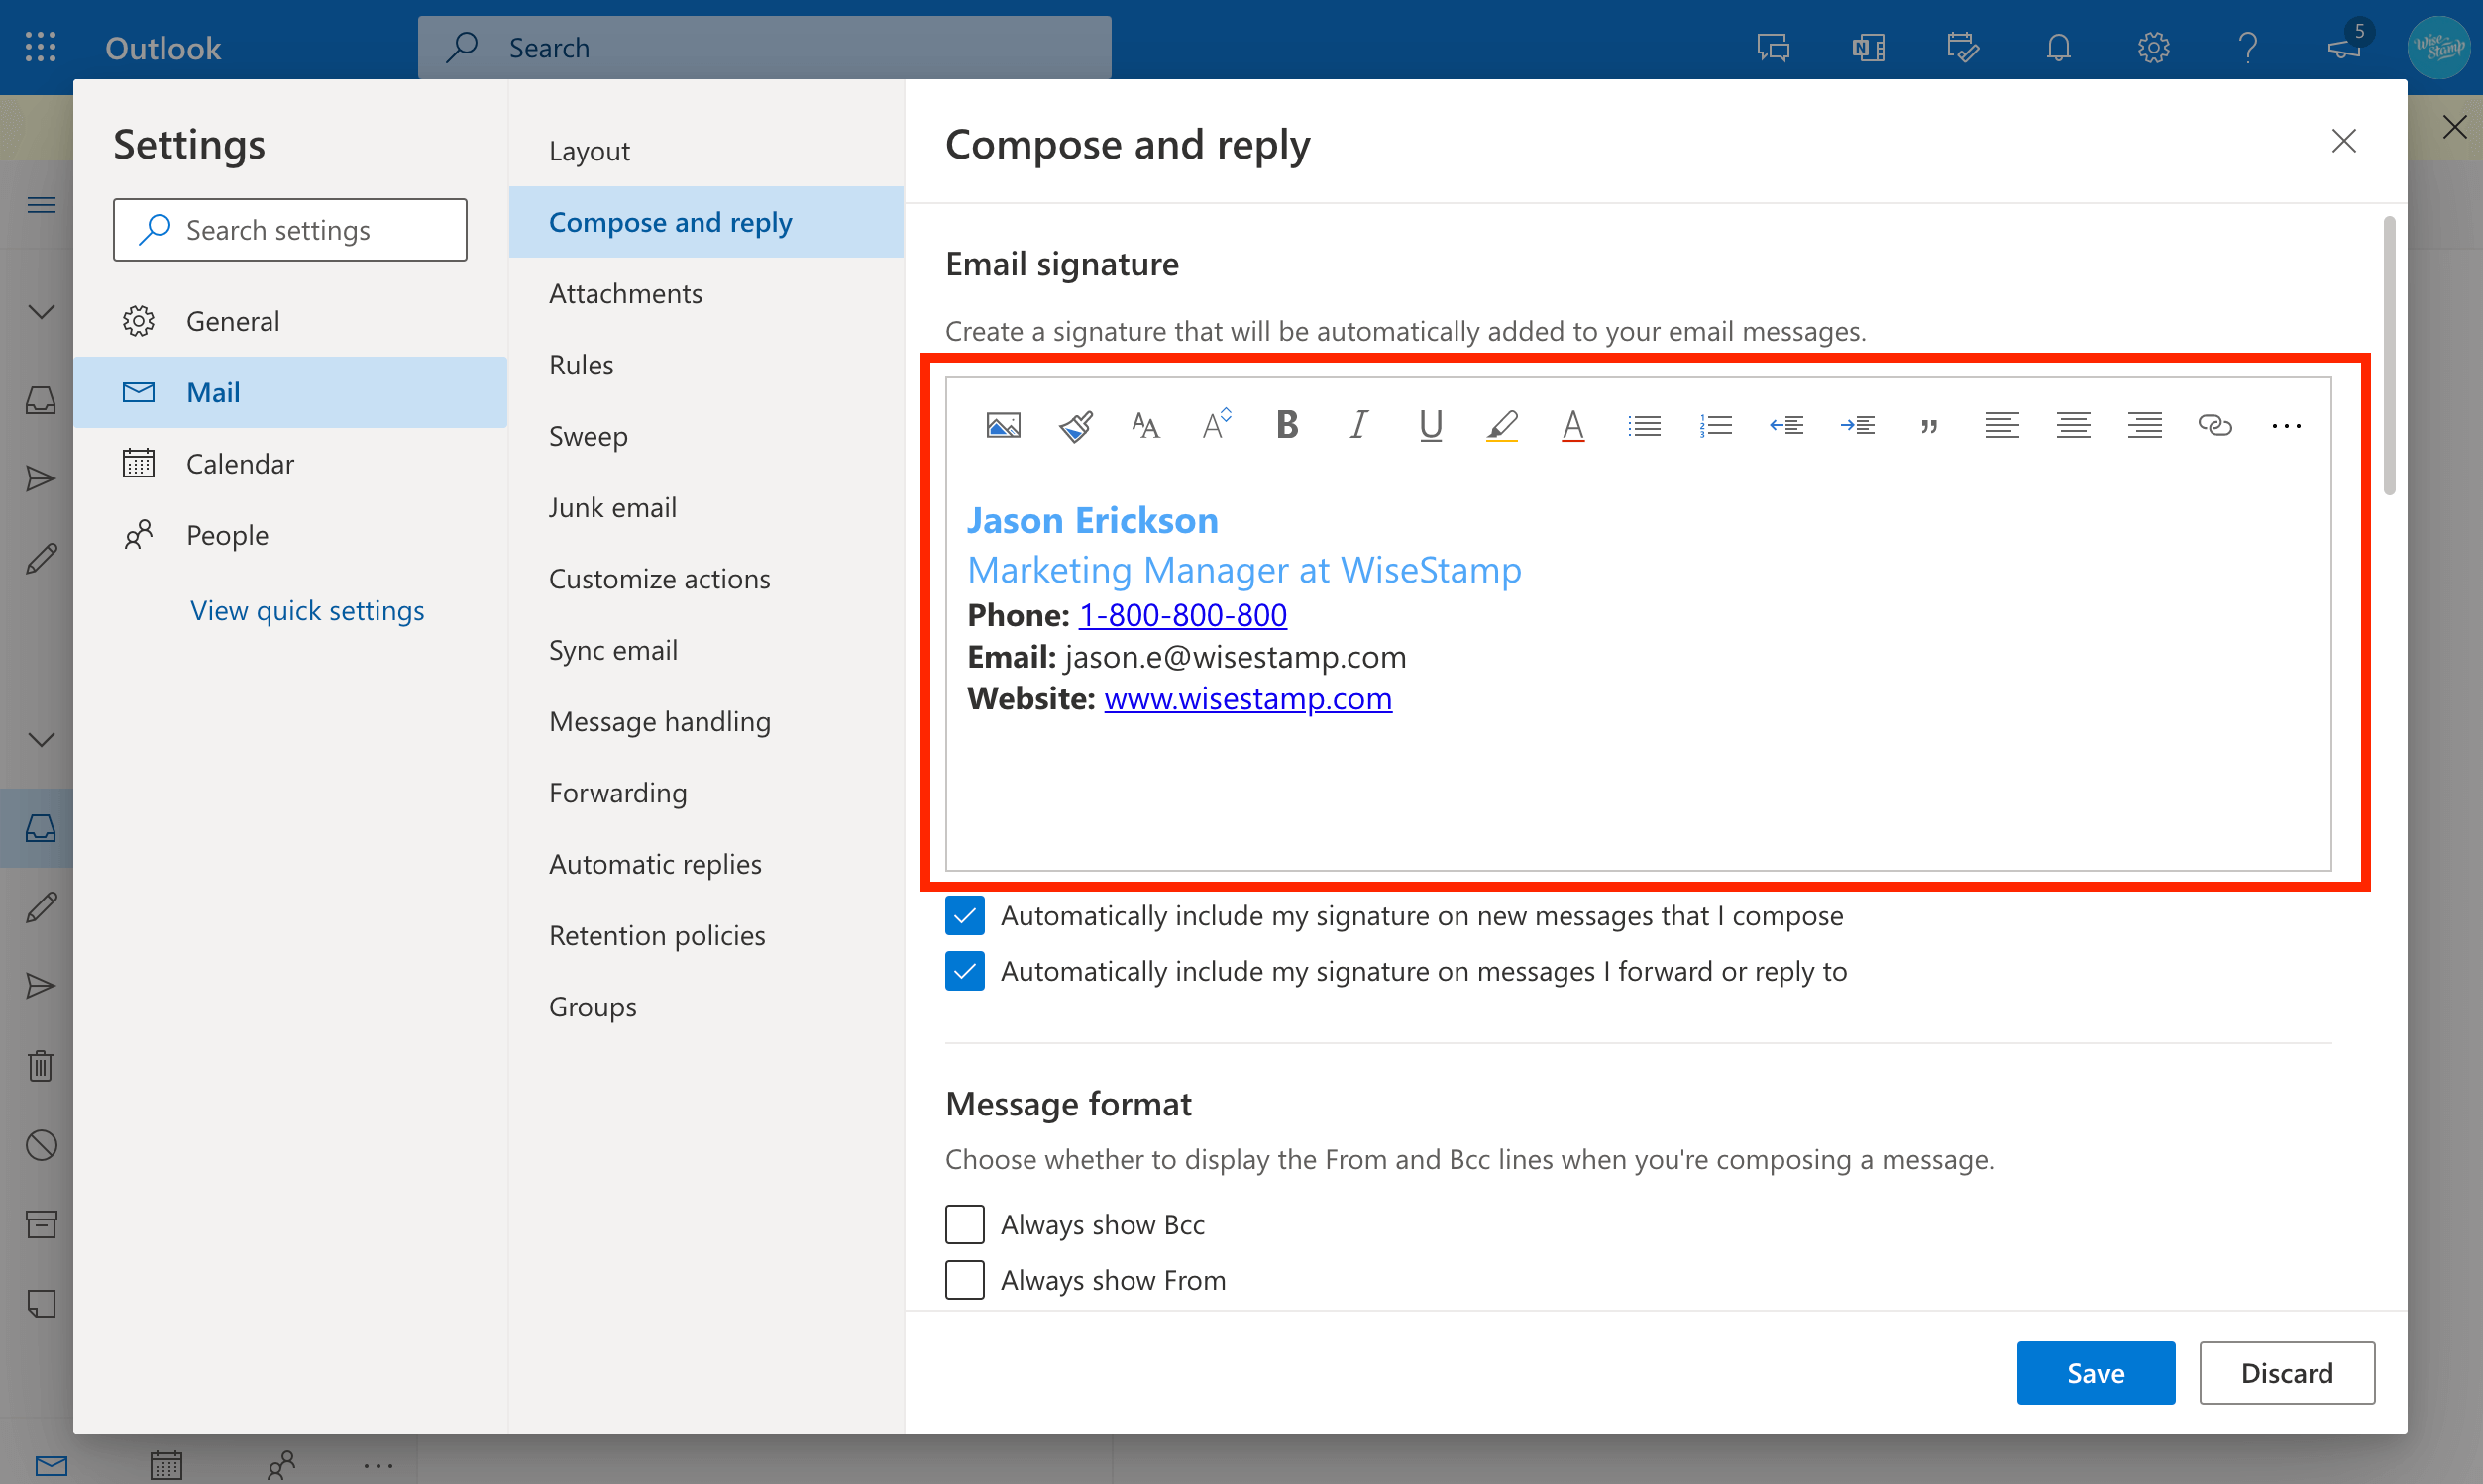
Step 1: Access the Outlook 365 Signature Menu
To access the signature menu in Outlook 365, you must first open the Outlook app. Once you are in the Outlook app, click on the “Settings” icon in the top right corner. Then, select “View all Outlook settings” from the drop-down menu. This will open a new window with all of the Outlook 365 settings. From here, click on “Compose and Reply” and then select “Signatures” from the list of options.
Step 2: Create a New Signature
Once you are in the signature menu, you will see a list of all the signatures you have created in Outlook 365. To create a new signature, click on the “New” button in the top right corner. This will open a new window where you can create your signature. In this window, you can add your name, email address, company name, logo, contact information, and profile picture. You can also customize the font, size, and color of the signature.
Step 3: Insert an Image
If you want to add an image to your signature, click on the “Insert Image” button. This will open a new window where you can upload the image you want to use. Once the image is uploaded, you can resize and position it in your signature.
Step 4: Select a Signature Type
Once you have finished creating your signature, you must select a signature type. You can choose to use the signature for all emails, new emails only, or replies and forwards only. This will ensure that your signature is used in the correct situations.
Step 5: Save Your Signature
Once you have finished creating and selecting a signature type, you must save your signature. To do this, click on the “Save” button in the bottom right corner of the window. This will close the window and save your signature.
Step 6: Use Your Signature
Once you have saved your signature, you can start using it in your emails. To insert your signature into an email, click on the “Signature” icon in the top right corner of the email window. This will open a drop-down menu where you can select the signature you want to use.
Step 7: Edit Your Signature
If you want to make any changes to your signature, you can easily do so by clicking on the “Edit” button in the signature menu. This will open the signature window where you can make any changes you want. Once you are finished, click on the “Save” button to save your changes.
Step 8: Set a Default Signature
If you want to make sure that your signature is used in all emails, you can set a default signature. To do this, click on the “Default Signature” button in the signature menu. This will open a window where you can select the signature you want to use as the default. Once you have selected the signature, click on the “Save” button to save your changes.
Related Faq
What is Outlook 365?
Outlook 365 is a cloud-based application developed by Microsoft for business users. It provides users with an integrated platform for managing their emails, calendars, contacts and other tasks. Outlook 365 offers features such as customizable inbox, calendar reminders and task management, allowing users to easily manage their daily lives from a single platform. Additionally, Outlook 365 provides users with access to their emails and other tasks from any device, regardless of their location.
How do I create a signature in Outlook 365?
Creating a signature in Outlook 365 is a simple process. To get started, open the Outlook 365 app and select the “File” tab. From there, choose “Options” followed by “Mail” and then “Signatures”. This will open the “Signatures and Stationery” window, where you can create a new signature. Type in your desired signature text, add any images or logos and format the text as desired. Finally, click “OK” to save your new signature.
What can I include in my Outlook 365 signature?
When creating a signature in Outlook 365, you have the option to include any text, images or logos that you would like. You can also format the text to your liking, such as adding bold, italics, hyperlinks and more. Additionally, you have the option to add your contact information, such as your phone number and website link, as well as social media links.
How do I make my Outlook 365 signature the default?
To make your Outlook 365 signature the default, open the “Signatures and Stationery” window and select the signature you want to set as default. Then, click the “Set as Default” button. Once you have done this, the signature will automatically be added to the bottom of all emails you send.
Can I add my signature to all of my emails in Outlook 365?
Yes, you can add your signature to all of your emails in Outlook 365. To do this, open the “Signatures and Stationery” window and select the signature you want to use. Then, check the box next to “Automatically include my signature on messages I send”. This will add your signature to all of your emails by default.
Can I have multiple signatures in Outlook 365?
Yes, you can have multiple signatures in Outlook 365. To create additional signatures, open the “Signatures and Stationery” window and click the “New” button. You can then create a new signature with any text, images or logos you want. Once you have created all of your signatures, you can select which one you want to use for each email.
Creating an email signature in Outlook 365 is a quick and easy process. It’s a great way to add a personal touch when sending emails, and it can also increase your professional credibility. With the help of Outlook’s built-in design tools, you can create a sophisticated signature in just a few steps. So go ahead, create your custom signature and make your emails stand out!


