


How to Make Cells in Excel Fit Text?

If you are looking for an easy and effective way to make sure the text in your Excel cells fits nicely, then look no further. In this article, we will provide you with simple instructions on how to make cells in Excel fit text. We will also highlight some useful tips and tricks to make the process easier and more efficient. So, read on to learn how to make cells in Excel fit text.
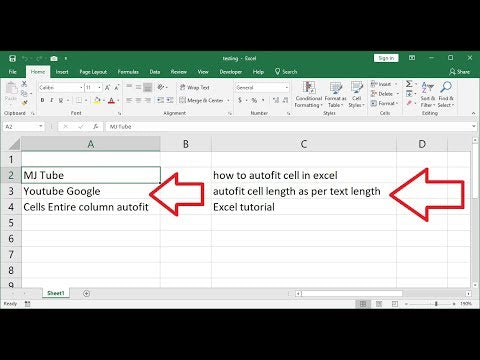
Alternatively, you can also double-click on the right side of the column header to automatically fit the contents of the cells.
Adjusting Cells in Excel to Fit Text
When working with Microsoft Excel, it is important to make sure all of the cells in the spreadsheet are properly formatted to fit the text. By adjusting the height and width of the cells, you can ensure that the content of your spreadsheet is easy to read, understand, and navigate. In this article, we will discuss how to make cells in Excel fit text.
Adjusting Cell Width
The first step in making cells in Excel fit text is to adjust the cell width. This can be done in two ways: manually or by using the AutoFit feature. If you choose to manually adjust the width of the cell, simply click and drag the border of the cell to the left or right until the desired width is achieved. If you would like to use the AutoFit feature, simply select the cells you would like to adjust and select the “Format Cells” option from the Home tab. Then, select the “AutoFit Column Width” option and Excel will automatically adjust the width of the cell to fit the text.
Adjusting Cell Height
The next step in making cells in Excel fit text is to adjust the cell height. This can be done in two ways: manually or by using the AutoFit feature. If you choose to manually adjust the height of the cell, simply click and drag the border of the cell up or down until the desired height is achieved. If you would like to use the AutoFit feature, simply select the cells you would like to adjust and select the “Format Cells” option from the Home tab. Then, select the “AutoFit Row Height” option and Excel will automatically adjust the height of the cell to fit the text.
Wrapping Text in Cells
The final step in making cells in Excel fit text is to wrap the text in the cell. This can be done by selecting the cells you would like to adjust and selecting the “Format Cells” option from the Home tab. Then, select the “Wrap Text” option and Excel will automatically adjust the width and height of the cell to fit the text.
Using Shrink to Fit
Another way to make cells in Excel fit text is to use the “Shrink to Fit” option. This is a great option if you have a lot of text that needs to fit into a single cell. To use this option, simply select the cells you would like to adjust and select the “Format Cells” option from the Home tab. Then, select the “Shrink to Fit” option and Excel will automatically adjust the font size of the text in the cell to make it fit.
Understanding Text Overflow
It is also important to be aware of text overflow when making cells in Excel fit text. Text overflow occurs when the amount of text in a cell exceeds the width or height of the cell. In this case, Excel will not adjust the size of the cell to fit the text, and instead the text will be cut off. To prevent this from happening, make sure to adjust the width and height of the cell or use the “Shrink to Fit” option before entering text into the cell.
Using Merge Cells
Finally, another way to make cells in Excel fit text is to use the “Merge Cells” option. This allows you to merge multiple cells into one larger cell, giving you more space to fit the text. To use this option, simply select the cells you would like to merge and select the “Format Cells” option from the Home tab. Then, select the “Merge Cells” option and Excel will automatically merge the cells into one larger cell.
Related Faq
Q1: What is the purpose of making cells in Excel fit text?
A1: The purpose of making cells in Excel fit text is to ensure that all the data in that cell is visible and can be read properly. It is especially useful for cells that contain lengthy or multiple pieces of text that are too long to appear fully in the default size of the cell. This can help to keep data organized and ensure that the data can be understood quickly and easily.
Q2: What are the different ways to make cells in Excel fit text?
A2: There are two main ways to make cells in Excel fit text. The first is to manually adjust the width of the column to expand the cell so that all the contents are visible. This can be done by either dragging the edge of the cell or by double-clicking the edge of the cell. The second way is to use the “Wrap Text” function which will automatically adjust the size of the cell to fit the contents of the cell.
Q3: How do you manually adjust the width of a cell to make it fit text?
A3: To manually adjust the width of a cell to make it fit text, first select the cell or cells that need to be adjusted. Then, click on the edge of the cell and drag it to the desired width. Alternatively, double-click on the edge of the cell to automatically adjust the width to fit the contents of the cell.
Q4: How do you use the “Wrap Text” function to make cells fit text?
A4: To use the “Wrap Text” function to make cells fit text, first select the cell or cells that need to be adjusted. Then, go to the “Home” tab and click on the “Alignment” group. In the “Alignment” group, click on the “Wrap Text” button which will automatically adjust the size of the cell to fit the contents of the cell.
Q5: What are the advantages of using the “Wrap Text” function to make cells fit text?
A5: The main advantage of using the “Wrap Text” function to make cells fit text is that it is faster and easier than manually adjusting the width of the cell. Additionally, it ensures that all the data in that cell is visible and can be read properly. This can help to keep data organized and ensure that the data can be understood quickly and easily.
Q6: Are there any disadvantages of using the “Wrap Text” function to make cells fit text?
A6: While the “Wrap Text” function can be an effective way to make cells fit text, it does have some limitations. Depending on the size of the cell, the text may not be as visible as it would be with manual adjustment. Additionally, if the cell is too small, the text may be cut off or be difficult to read. Therefore, it is important to ensure that the cell is large enough to accommodate the text before using the “Wrap Text” function.
How To Fit Longer Text or Text Wrapping In Excel. Excel Tip
In conclusion, making cells in Excel fit text is a great way to make your Excel spreadsheets look neat and organized. By adjusting the column widths, wrapping text, and using the auto fit feature, you can easily adjust the columns to fit your text. With just a few clicks, you can make your Excel spreadsheets look neat and tidy.


