


How to Screenshot on Acer Desktop Windows 10?

Are you an Acer desktop user who has just upgraded to Windows 10 and need help figuring out how to take screenshots? Don’t worry, you’re not alone. In this article, we’ll show you how to take screenshots on your Acer desktop Windows 10, so you can capture all the important moments on your screen. We’ll cover the various methods of screenshotting, as well as a few tips and tricks to make your screenshots look professional. So, let’s get started!
How to Screenshot on Acer Desktop Windows 10?
- Press the Windows logo key + PrtScn. The screenshot is saved to your Pictures > Screenshots folder.
- Open an image editing program (like Microsoft Paint), paste the screenshot from the clipboard, and save the file.
- Press the PrtScn button to take a screenshot of the entire screen. The screenshot is saved to the Clipboard.
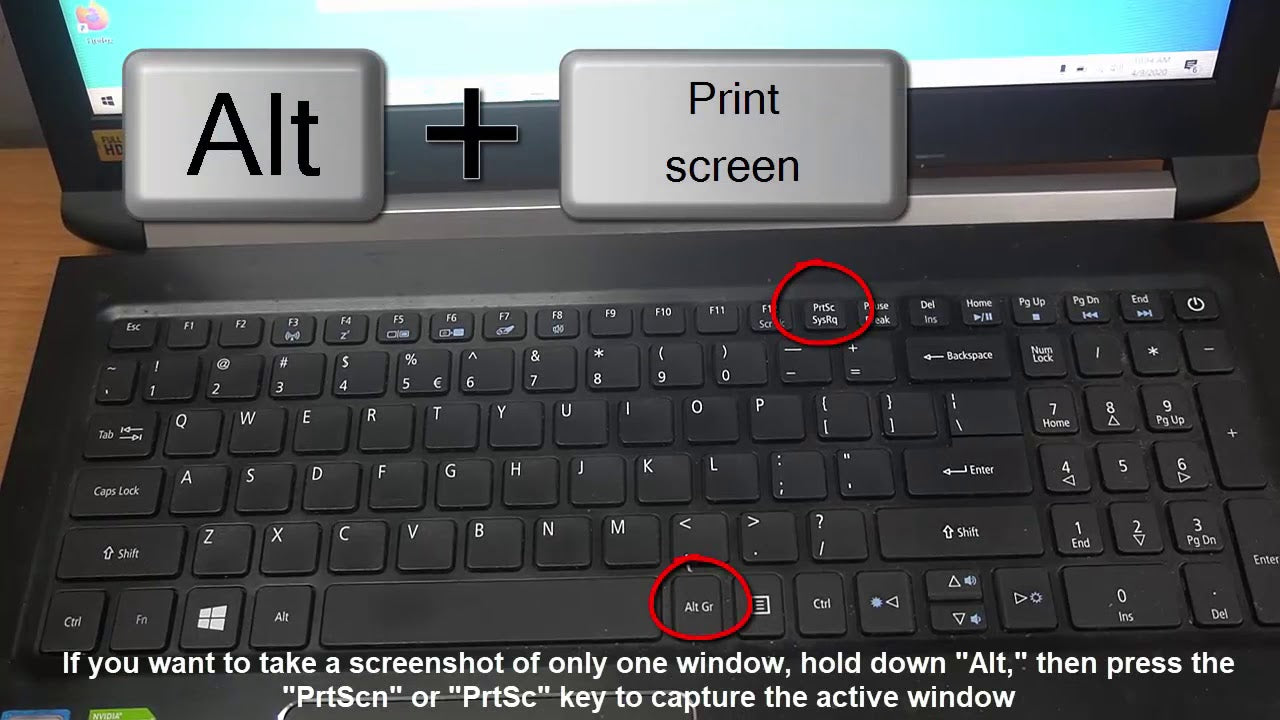
- Press the Alt + PrtScn keys to take a screenshot of the active window.
Learn How to Take a Screenshot on Acer Desktop with Windows 10
Taking a screenshot on Acer Desktop with Windows 10 is a fairly simple process. Whether you’re looking to capture a screenshot of the entire desktop or just a small portion of the screen, Windows 10 offers multiple methods to do so. In this article, we’ll explain the different ways to take a screenshot on an Acer desktop running Windows 10.
Using the Print Screen Key
The standard method for taking a screenshot on a Windows desktop is by using the Print Screen key. This key is typically located on the top row of the keyboard, either at the far right or above the arrow keys. To take a screenshot of your entire desktop, press the Print Screen key. The screenshot will be copied to the clipboard and can be pasted into an image editor or document.
Using the Snipping Tool
Windows 10 also includes a Snipping Tool, which allows you to capture a portion of the screen. To access the Snipping Tool, click the Start button and search for Snipping Tool. Once the tool is open, click the New button to capture a portion of the screen. You can also use the Delay button to capture a screenshot after a specified amount of time.
Using the Windows + Shift + S Shortcut
The Windows + Shift + S shortcut is a quick and easy way to take a screenshot on a Windows 10 desktop. This shortcut will open a small toolbar at the top of the screen that allows you to capture a portion of the screen. You can also select the type of screenshot you want to capture, such as a rectangular screenshot or a freeform screenshot.
Saving the Screenshot
Once you have taken a screenshot, you will need to save it in order to access it. If you used the Print Screen key, the screenshot will already be saved to the clipboard. To save the screenshot, open an image editor or document and paste the screenshot. If you used the Snipping Tool or the Windows + Shift + S shortcut, the screenshot will be saved to the Screenshots folder in your Pictures library.
Using a Third-Party App
If you would like more options for taking screenshots, there are a variety of third-party apps available. These apps allow you to capture screenshots with a single click or set up hotkeys for capturing screenshots. Some of these apps even offer the ability to annotate or edit the screenshots before saving them.
Conclusion
Taking a screenshot on an Acer desktop with Windows 10 is a simple process. By using the Print Screen key, the Snipping Tool, or the Windows + Shift + S shortcut, you can quickly capture a screenshot of your desktop. If you are looking for more features and options, there are also a variety of third-party apps available.
Frequently Asked Questions
Q1: How do I take a screenshot on an Acer Desktop Windows 10?
A1: Taking a screenshot on an Acer Desktop Windows 10 is quick and easy. All you need to do is press the “Print Screen” key on your keyboard, which is usually labeled “PrtScn” or “PrtSc.” Once you press the key, the screenshot will be saved to the clipboard, and you can paste it into an image editing program like Paint or Photoshop. Alternatively, you can also use the “Snipping Tool” that comes with Windows 10 to take a screenshot. This is a great option if you want to capture a specific area of your screen or if you want to add annotations before saving the screenshot.
Q2: How do I take a screenshot of only one window on my Acer Desktop Windows 10?
A2: To take a screenshot of only one window on your Acer Desktop Windows 10, you can use the “Snipping Tool” that comes with Windows 10. To open the tool, press the Windows key and type “Snipping Tool” into the search bar. Once you open the tool, you can select the “Window Snip” option to select the window that you want to screenshot. Once you have selected the window, you can save the screenshot to your computer.
Q3: How do I take a screenshot and save it as a file on my Acer Desktop Windows 10?
A3: To take a screenshot and save it as a file on your Acer Desktop Windows 10, you can use the “Snipping Tool” that comes with Windows 10. To open the tool, press the Windows key and type “Snipping Tool” into the search bar. Once you open the tool, you can select the type of screenshot you want to take and then click the “Save As” button to save the screenshot as an image file on your computer.
Q4: How do I take a screenshot of a specific area on my Acer Desktop Windows 10?
A4: To take a screenshot of a specific area on your Acer Desktop Windows 10, you can use the “Snipping Tool” that comes with Windows 10. To open the tool, press the Windows key and type “Snipping Tool” into the search bar. Once you open the tool, you can select the “Rectangular Snip” option to select the area of your screen that you want to screenshot. Once you have selected the area, you can save the screenshot to your computer.
Q5: How do I take a screenshot and email it from my Acer Desktop Windows 10?
A5: To take a screenshot and email it from your Acer Desktop Windows 10, you can use the “Snipping Tool” that comes with Windows 10. To open the tool, press the Windows key and type “Snipping Tool” into the search bar. Once you open the tool, you can select the type of screenshot you want to take and then click the “Email” button to email the screenshot from your computer.
Q6: How do I take a screenshot and share it on social media from my Acer Desktop Windows 10?
A6: To take a screenshot and share it on social media from your Acer Desktop Windows 10, you can use the “Snipping Tool” that comes with Windows 10. To open the tool, press the Windows key and type “Snipping Tool” into the search bar. Once you open the tool, you can select the type of screenshot you want to take and then click the “Share” button to share the screenshot on social media. You can also use the “Share” button to share the screenshot via email or another messaging service.
How To Take a Screenshot on Acer laptop
Taking a screenshot on an Acer Desktop Windows 10 is easy and straightforward. With the two methods outlined above, you can quickly and easily capture, save, and share all of your important screenshots. Whether you need to take a screenshot for a project, presentation, or just for fun, you will be able to do it quickly and easily with the help of this guide.


