


How To Set Reminder In Outlook Office 365?

Are you struggling to remember important tasks and appointments? Outlook Office 365 can help take some of the stress off your shoulders! In this article, we will discuss how to set reminders in Outlook Office 365, so you never miss an important deadline or meeting again. We will provide step-by-step instructions on how to create and edit reminders, as well as tips for managing and organizing your reminders. With this guide, you will be able to take control of your tasks and schedule, and you will never miss an important event again. Let’s get started!
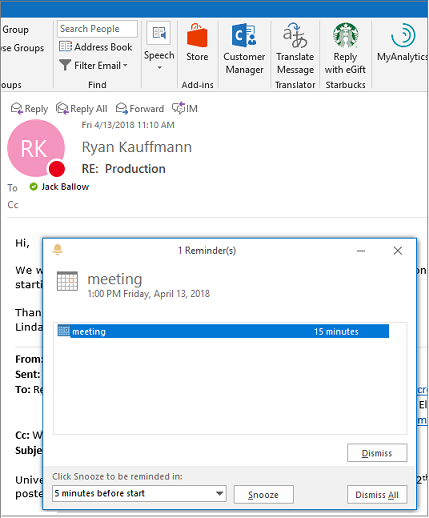
How to Set Reminder in Outlook Office 365?
- Open Outlook Office 365.
- Go to the “Calendar” tab.
- Choose the date and time for the reminder.
- Click on the “Reminder” button.
- Enter your reminder message.
- Click on the “Save” button.
- Your reminder has been successfully set.
How to Create a Reminder in Outlook Office 365
Reminders are a great way to stay on top of tasks and important emails in Outlook Office 365. This article will provide step-by-step instructions on how to create a reminder in Outlook Office 365.
To create a reminder in Outlook Office 365, you will need to have the Outlook application installed on your computer. Once you have the Outlook application installed, you can follow the steps below to set up a reminder.
Step 1: Open the Outlook Application
The first step is to open the Outlook application on your computer. Once the application is opened, you will be able to see your emails, calendar, and tasks.
Step 2: Create a New Reminder
The next step is to create a new reminder. To do this, click on the “Tasks” tab in the navigation bar at the bottom of the Outlook application. This will open the “Tasks” window, where you can create a new reminder.
Step 3: Set the Reminder Details
The third step is to set the details for the reminder. You can enter a title for the reminder, set the date and time for when you want the reminder to be sent, and add any notes or details that you would like to include.
Step 4: Save the Reminder
The fourth step is to save the reminder. Once you have entered all of the necessary details for the reminder, click the “Save” button to save the reminder. You can also choose to share the reminder with other people if you wish.
Step 5: View the Reminder
The fifth and final step is to view the reminder. To view the reminder, click on the “Tasks” tab in the navigation bar at the bottom of the Outlook application. This will open the “Tasks” window, where you can view the reminder that you have created.
Step 6: Manage the Reminder
The sixth and final step is to manage the reminder. To manage the reminder, you can edit the reminder, delete the reminder, or mark the reminder as completed. You can also set a recurring reminder if you want the reminder to be sent multiple times.
Few Frequently Asked Questions
How to Set Reminder in Outlook Office 365?
Q1: What is Outlook Office 365?
A1: Outlook Office 365 is a subscription-based cloud-based version of the Microsoft Outlook personal information management software suite. It includes a range of features such as an email client, calendar, contact manager, task manager, note taking, journal, and web browsing. It also offers integration with other Microsoft Office 365 services, such as Skype for Business, Microsoft Teams, and OneDrive.
Q2: What is a reminder in Outlook Office 365?
A2: A reminder in Outlook Office 365 is a feature that allows you to set a specific time for a notification or alert to appear. Reminders can be set to remind you of important meetings, tasks, deadlines, and other events. Reminders can also be used to remind yourself of personal tasks, such as taking medication.
Q3: How do I set a reminder in Outlook Office 365?
A3: Setting a reminder in Outlook Office 365 is easy. First, open the Outlook calendar and select the date and time of the reminder. Next, click the “Reminder” button at the top of the calendar. You can then enter the subject and body of the reminder, as well as any notes you may want to add. Finally, click the “Set Reminder” button to save the reminder.
Q4: Can I set multiple reminders in Outlook Office 365?
A4: Yes, you can set multiple reminders in Outlook Office 365. To do this, open the Outlook calendar, select the date and time of the reminder, and click the “Reminder” button at the top of the calendar. You can then enter the subject and body of the reminder, as well as any notes you may want to add. When you have finished entering all the information, click the “Set Reminder” button to save the reminder. You can repeat this process to create as many reminders as you need.
Q5: How do I delete a reminder in Outlook Office 365?
A5: To delete a reminder in Outlook Office 365, open the Outlook calendar, select the date and time of the reminder, and click the “Reminder” button at the top of the calendar. You can then click the “Delete Reminder” button to delete the reminder. You can also delete a reminder by selecting it in the list of reminders and pressing the delete key on your keyboard.
Q6: Is there a way to set a recurring reminder in Outlook Office 365?
A6: Yes, you can set a recurring reminder in Outlook Office 365. To do this, open the Outlook calendar, select the date and time of the reminder, and click the “Reminder” button at the top of the calendar. You can then click the “Recurring” button and select the frequency of the reminder. You can choose to set a reminder that recurs daily, weekly, monthly, or yearly. When you have finished setting the reminder, click the “Set Reminder” button to save the reminder.
In conclusion, setting a reminder in Outlook Office 365 is a simple process that can help you stay on top of important tasks and events. By following the steps outlined in this article, you will be able to quickly and easily set up reminders for yourself or others. You can use this tool to ensure that you never miss an important meeting or deadline. With Outlook Office 365, you can be sure that you will never forget another important task or event again.


