


How Do I Create A Fillable Form In Sharepoint?

Are you looking for an efficient way to create a fillable form in Sharepoint? With the right instructions and knowledge, you can easily set up a fillable form within Sharepoint. In this article, we will walk you through the steps to create a fillable form in Sharepoint from scratch. We will also discuss the different types of forms that you can create and the benefits of using Sharepoint to create them. So, if you’re ready to get started, let’s jump right in!
Creating a fillable form in SharePoint is easy and straightforward. All you need to do is:
- Open the SharePoint site and select the form library where you want to create the form.
- On the ribbon, select the “New Document” button and select “Form” from the drop-down list.
- A new page will appear with the default form fields. You can add or delete fields, or change the text or layout of the form.
- To make a field fillable, select the “Edit” option next to the field and select “Change Control”.
- From the drop-down list, select the “Fill-in-Field” option.
- Save the form and share it with the users who need to fill it in.
Creating Fillable Forms in Sharepoint
Sharepoint is a powerful web-based platform for creating, managing, and sharing documents. It is widely used by businesses, organizations, and individuals for a variety of tasks, including creating and managing forms. Forms created in Sharepoint can be used to collect data, take surveys, and much more.
What Are Fillable Forms?
Fillable forms are digital forms that can be filled out online. They are especially useful for collecting data, such as customer information or survey responses. Fillable forms can also be used to create and manage documents, such as contracts or invoices.
How Do I Create a Fillable Form in Sharepoint?
Creating a fillable form in Sharepoint is relatively simple and straightforward. Here are the steps:
Step 1: Log in to Sharepoint
The first step is to log in to your Sharepoint account. Once logged in, you will be able to access the Sharepoint home page.
Step 2: Create a New Form
On the Sharepoint home page, click on the “Create a New Form” button. This will open a new window where you can enter the name of the form and choose the type of form you want to create.
Step 3: Add Content to the Form
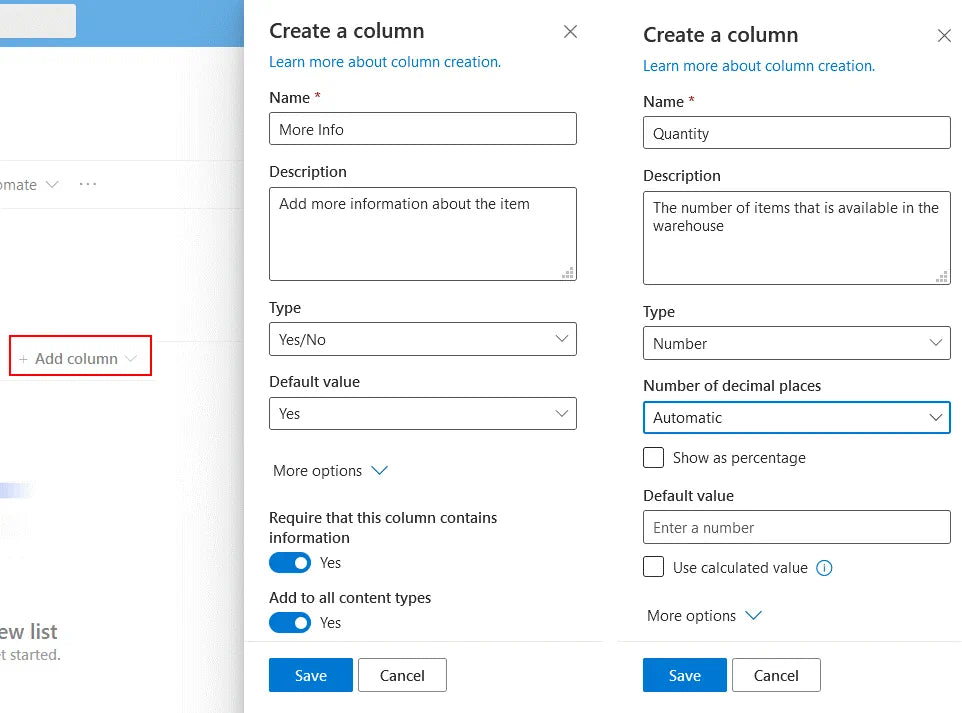
Once you have chosen the type of form you want to create, you can start adding content to it. You can add text boxes, drop-down menus, check boxes, and other types of form elements. You can also add images to the form if you want.
Step 4: Set Form Options
Once you have added all of the content to the form, you can set form options. You can choose whether the form should be public or private, whether it should be password protected, and whether it should require users to log in before they can submit the form.
Step 5: Publish the Form
Once you have finished creating and setting the form options, you can click on the “Publish” button. This will make the form available to users. You can choose to share the form with specific users, or you can make it public and allow anyone to access it.
Step 6: View Responses
Once the form has been published, you can view the responses to it. You can view the responses on the Sharepoint dashboard, or you can export the data to a spreadsheet.
Step 7: Edit the Form
If you need to change the form, you can edit it at any time. You can add or remove form elements, change text, and make other changes to the form.
Step 8: Share the Form
Once you have finished creating and editing the form, you can share it with other users. You can share the form via email, or you can embed the form on a website or blog.
Step 9: Track Responses
You can track responses to the form by using the Sharepoint dashboard. You can view response summaries, view individual responses, and export the data to a spreadsheet.
Step 10: Archive the Form
When you are finished collecting responses, you can archive the form. Archiving the form will make it inaccessible to users, and you can always restore the form if you need to access it in the future.
Frequently Asked Questions
What is a Fillable Form?
A fillable form is a document that allows users to enter data into fields and then save the form with the entered data. Fillable forms are often used in business or educational settings to collect data from multiple users in an efficient manner. Fillable forms can be created using Microsoft SharePoint, a web-based document sharing and collaboration platform.
How do I Create a Fillable Form in SharePoint?
Creating a fillable form in SharePoint is a relatively straightforward process. First, you’ll need to create a document library if you don’t already have one. Once you have a document library set up, create a new form based on a template or an existing form, or upload an existing form. Once your form is uploaded, you’ll be able to add fields to the form and customize the look and feel of the form. Finally, you’ll need to set up permissions for the form to ensure that only authorized users have access to it.
What are the Benefits of Using SharePoint for Fillable Forms?
Using SharePoint for fillable forms has many benefits. It allows multiple users to collaborate on the same form, so they can easily share data and make changes to the form as needed. It also allows you to manage permissions for the form, so you can ensure that only authorized users have access to it. Additionally, SharePoint makes it easy to track form submissions and review the data that has been entered into the form.
Are There Any Limitations to Using SharePoint for Fillable Forms?
Yes, there are some limitations to using SharePoint for fillable forms. For example, SharePoint may not be able to support certain types of forms, such as those with complex logic or calculations. Additionally, the forms may not be able to integrate with other applications or services, such as payment processors. Finally, SharePoint may not be able to support certain types of media, such as videos or images.
Is There a Way to Make My Fillable Forms More User-Friendly?
Yes, there are a few ways to make your fillable forms more user-friendly. For example, you can add descriptions or tooltips to the form fields to explain what type of data should be entered. You can also create “help” pages that provide step-by-step instructions on how to complete the form. Additionally, you can add conditional logic to the form, so that certain fields are only displayed to certain users based on their answers to other questions. Finally, you can add custom colors and fonts to the form to make it more aesthetically pleasing.
Creating a fillable form in SharePoint is a great way to streamline the collection of data from your team. It can be used for gathering information from customers and employees, as well as collecting feedback on projects. With the right approach and the right tools, you can create a fillable form that meets the needs of your organization. With SharePoint’s easy-to-use features, you can quickly design a form that will help your team stay organized and get the job done.


