


How to Calculate a Future Date in Excel?

If you need to quickly and accurately calculate a future date in Excel, then this article is for you. From calculating age to forecasting a payment due date or even tracking upcoming events, Excel can help you get the job done. In this guide, we’ll show you exactly how to calculate a future date in Excel and provide some helpful tips to get the most out of this powerful spreadsheet program. So let’s get started!
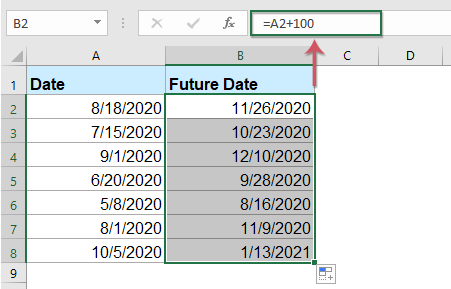
- Step 1: Input the current date in a cell.
-
Step 2: Use the Excel formula
=DATE(year, month, day)to calculate the future date. - Step 3: The formula takes three arguments: year, month, and day.
-
Step 4: Use the
DATEVALUE functionto convert the result into a date.
language
Calculating a Future Date in Excel
Microsoft Excel is a powerful spreadsheet program that allows users to quickly and easily create calculations and perform data analysis. One useful feature of Excel is the ability to calculate a future date. This can be useful for planning and forecasting, as well as for budgeting and scheduling. In this article, we will discuss how to calculate a future date in Excel.
Using Excel’s Date Functions
Excel has several built-in functions that can be used to calculate a future date. The most commonly used function is the DATE function, which takes three arguments: the year, month, and day. For example, to calculate the date two weeks from today, you could use the following formula: =DATE(YEAR(TODAY()),MONTH(TODAY()),DAY(TODAY())+14). This formula uses the TODAY function to get the current date, and then adds 14 days to calculate the future date.
Another useful function is the EDATE function, which calculates a future date based on a specified number of months. For example, to calculate the date three months from today, you could use the following formula: =EDATE(TODAY(),3). This formula uses the TODAY function to get the current date, and then adds three months to calculate the future date.
Using Excel’s Date Formatting
In addition to using Excel’s date functions, you can also use Excel’s date formatting to quickly calculate a future date. To do this, select the cells containing the dates you want to calculate and then right-click and select Format Cells. In the Number tab, select Date from the Category list and then select the desired date format from the Type list.
Once you have selected the desired date format, enter the formula =TODAY()+14 in the formula bar and press Enter. This will calculate the date two weeks from today and format it according to the selected date format. You can use this technique to quickly calculate a future date in any desired format.
Using Excel’s Date Picker
Excel also includes a Date Picker, which can be used to quickly calculate a future date. To access the Date Picker, select the cell containing the date you want to calculate and then click the Date Picker icon in the Number group on the Home tab.
Once the Date Picker is open, select the desired date from the calendar. This will automatically calculate the date and enter it into the selected cell. You can also use the arrows at the top of the Date Picker to navigate to the desired date.
Using Excel’s Date Math
Finally, you can use Excel’s Date Math feature to quickly calculate a future date. To access this feature, select the cell containing the date you want to calculate and then click the Date Math icon in the Number group on the Home tab.
Once the Date Math window is open, enter the desired number of days, months, or years and then click the Calculate button. This will automatically calculate the future date and enter it into the selected cell.
Conclusion
In this article, we discussed how to calculate a future date in Excel. We looked at using Excel’s date functions, date formatting, date picker, and date math features to quickly and easily calculate future dates. With these tools, you can easily perform date calculations for budgeting, scheduling, planning, and forecasting.
Few Frequently Asked Questions
Question 1: How Do I Calculate a Future Date in Excel?
Answer: Calculating a future date in Excel is a straightforward process. To do so, you’ll need to use the DATE() and EDATE() functions. The DATE() function is used to create a date from multiple components such as a year, month, and day. The EDATE() function is used to find the date a certain number of months in the future. To use both functions, you’ll need to provide the appropriate arguments. For the DATE() function, you’ll need to provide the year, month, and day as numbers. For the EDATE() function, you’ll need to provide the start date and the number of months to add. Once you’ve provided the appropriate arguments, Excel will calculate the future date and display it on the worksheet.
Question 2: What Arguments Does the DATE() Function Require?
Answer: The DATE() function requires three arguments: year, month, and day. All the arguments must be numbers. The year argument is a 4-digit number that represents the year. The month argument is a number from 1 to 12 that represents the month. The day argument is a number from 1 to 31 that represents the day. You can also use the DAY(), MONTH(), and YEAR() functions to extract the components of a date.
Question 3: What Arguments Does the EDATE() Function Require?
Answer: The EDATE() function requires two arguments: start date and number of months. The start date argument is a date that Excel uses as the starting point for the calculation. The number of months argument is a number that represents the number of months to add to the start date. This argument can be positive or negative, which means you can also use the EDATE() function to find a date in the past.
Question 4: How Do I Use the DATE() and EDATE() Functions Together?
Answer: To use the DATE() and EDATE() functions together, you’ll need to first create a date using the DATE() function. Then, you’ll use the EDATE() function to find the date a certain number of months in the future. The EDATE() function requires the start date as an argument, so you’ll use the date created with the DATE() function as the start date. You’ll also need to provide the number of months as an argument. Once you’ve provided the appropriate arguments, Excel will calculate the future date and display it on the worksheet.
Question 5: Can I Use the EDATE() Function to Calculate a Date in the Past?
Answer: Yes, you can use the EDATE() function to calculate a date in the past. The EDATE() function requires the number of months as an argument, which can be positive or negative. If you provide a negative number, Excel will calculate the date a certain number of months in the past.
Question 6: Is There a Way to Automatically Calculate a Future Date in Excel?
Answer: Yes, you can use Excel’s AutoFill feature to automatically calculate a future date. To do so, you’ll need to create a series of dates using the DATE() and EDATE() functions. For the first date, you’ll need to manually enter the date using the DATE() function. For the remaining dates, you can use the AutoFill feature to fill in the series. To use the AutoFill feature, select the first two dates and drag the fill handle down to the desired number of dates. Excel will automatically calculate the future dates and fill in the series.
Calculate a Future Date in Excel – WORKDAY and WORKDAY.INTL Functions
Calculating future dates in Excel is a great way to plan ahead and stay organized. It can be a powerful tool to help you keep track of important dates and make the most of your time. With a few simple steps and a little practice, you can quickly and easily calculate future dates in Excel. Whether you’re planning events, tracking deadlines, or setting goals, Excel can be a helpful tool in staying on top of your schedule.


