


How To Create A Discussion Board In Sharepoint?

Creating a discussion board in Sharepoint can be a daunting task, but with the right direction, it can be an easy and effective way to facilitate conversations among colleagues. In this article, we will look at how to create a discussion board in Sharepoint, why it may be beneficial for your organization, and what you need to consider when setting up such a board. By the end of this article, you will be armed with the knowledge and resources to create a discussion board that fits your organization’s needs.
Creating a Discussion Board in SharePoint:
- Log in to your SharePoint account.
- Navigate to the site where you want to create the discussion board.
- Select the “Settings” icon, then select “Add an App”.
- Choose “Discussion Board” from the list of apps.
- Name your discussion board, then select “Create”.
- The discussion board will be created, and you can start customizing it and adding content.
language only.
How to Create a Discussion Board in Sharepoint?
Sharepoint is a powerful tool that allows you to create and manage discussion boards. With Sharepoint, you can quickly set up a community hub for your organization or project. Sharepoint discussion boards provide an easy way to communicate with team members and collaborate on projects. This article will provide a step-by-step guide on how to create a discussion board in Sharepoint.
Step 1: Logging into Sharepoint
The first step in creating a discussion board in Sharepoint is to log in to your Sharepoint account. If you don’t have an account, you can easily set one up by going to Sharepoint’s website and clicking the “Sign Up” button. Once you have logged in, you will be taken to the Sharepoint homepage.
Step 2: Creating the Discussion Board
Once you are logged in, you will need to create the discussion board. To do this, click on the “Sites” tab in the top navigation bar. On the next page, click on the “Create” button and select “Discussion Board” from the list of options. You will then be taken to a page where you can enter the name and description of the discussion board. Once you have done so, click the “Create” button to create the discussion board.
Step 3: Adding Content to the Discussion Board
Now that you have created the discussion board, it’s time to add content to it. To do this, click on the “Content” tab in the top navigation bar. From there, you can create posts, upload documents and images, and add tags to individual posts. You can also edit the discussion board settings from this page, such as enabling or disabling comments and setting up moderation.
Step 4: Inviting Users to the Discussion Board
Once you have added content to the discussion board, the next step is to invite users to join the discussion board. To do this, click on the “People” tab in the top navigation bar. On the next page, you can search for users by email address or name and then click the “Invite” button to invite them to join the discussion board.
Step 5: Creating Moderators for the Discussion Board
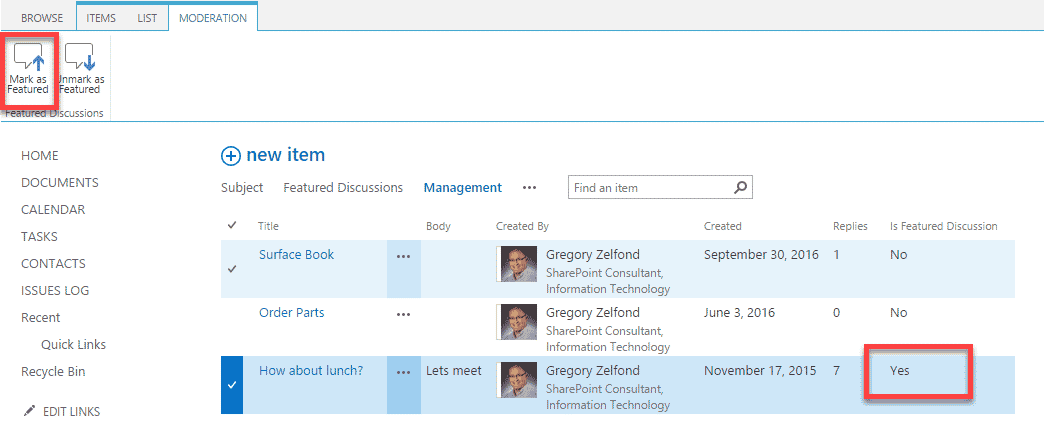
If you want to ensure that the discussion board remains on-topic, it is advisable to create moderators for the discussion board. To create a moderator, click on the “Settings” tab in the top navigation bar. On the next page, click on the “Moderators” tab and enter the name of the person you want to moderate the discussion board. Once you have done so, click the “Save” button to save the changes.
Step 6: Setting Up Email Notifications
You can also set up email notifications for the discussion board. This will ensure that users are notified when new posts are added to the discussion board. To do this, click on the “Settings” tab in the top navigation bar. On the next page, you can select which types of notifications you want to receive, such as post updates, comments, and likes. Once you have made your selection, click the “Save” button to save the changes.
Step 7: Managing the Discussion Board
Once your discussion board has been set up, you can manage it from the “Manage” tab in the top navigation bar. On the next page, you can view the discussion board activity, moderate posts, and manage members. You can also delete posts, ban members, and edit the discussion board settings from this page.
Step 8: Adding Pictures and Documents
You can also add pictures and documents to your discussion board to make it more interesting and engaging. To do this, click on the “Content” tab in the top navigation bar. On the next page, you can upload pictures and documents by clicking the “Upload” button. You can also drag and drop files directly into the discussion board.
Step 9: Adding Polls to the Discussion Board
Polls can be a great way to engage users and spark conversations on the discussion board. To add a poll, click on the “Content” tab in the top navigation bar. On the next page, click on the “Polls” button and then click “Create Poll.” You can then enter the poll question and the available answers. Once you have done so, click the “Save” button to save the poll.
Step 10: Analyzing the Discussion Board Performance
Once your discussion board is up and running, you can analyze its performance from the “Analytics” tab in the top navigation bar. On the next page, you can view detailed statistics about the discussion board, such as the number of posts, comments, and likes. This will help you identify areas for improvement and ensure that the discussion board is meeting your goals.
Frequently Asked Questions
What is Sharepoint?
Sharepoint is a cloud-based platform developed by Microsoft to help organizations share, collaborate and manage data. It is a content management system that enables users to store, manage, share and access documents, images, videos and other files in a secure environment. Sharepoint also provides tools for users to collaborate on projects, manage tasks, and track progress.
Sharepoint also enables users to create sites, blogs, wikis and discussion boards to encourage collaboration and communication within an organization. These discussion boards act as a forum for sharing ideas, gathering feedback and engaging in conversations.
How to Create a Discussion Board in Sharepoint?
Creating a discussion board in Sharepoint is easy and straightforward. The first step is to log into your Sharepoint site and navigate to the page where you want to create the discussion board. Then, click on the “Site Actions” button and select “More Options.” From the list of available options, select “Discussion Board” and click “Create.”
Next, give your discussion board a name and a description. You can also customize the default settings, such as adding categories or enabling moderation. Once you’re done, click “Create” to create your discussion board. Your users can now start posting messages, sharing files and engaging in conversations on the discussion board.
What are the Benefits of Using Sharepoint Discussion Boards?
Sharepoint discussion boards provide a great platform for teams to collaborate and communicate. It allows users to share ideas and gather feedback in an organized and secure environment. It also helps to improve communication among team members, as they can engage in conversations, share files and discuss topics in real-time.
Discussion boards also provide a great way to track conversations and progress. Members can easily view previous posts and track the progress of each discussion. This makes it easier for teams to stay on top of their projects and ensure that tasks are completed in a timely manner.
What are the Limitations of Sharepoint Discussion Boards?
Sharepoint discussion boards are powerful tools, but they come with certain limitations. For instance, they can be difficult to manage if the team is large. It can also be difficult to keep track of the conversations and progress if the discussion board is not organized properly.
Additionally, Sharepoint discussion boards are not suitable for highly sensitive data, as they are not as secure as other collaboration tools. Therefore, it’s important to consider these limitations before using Sharepoint discussion boards for critical projects.
How to Customize a Sharepoint Discussion Board?
Sharepoint discussion boards can be easily customized to suit the needs of your team. You can add categories, enable moderation, and customize the default settings to make the discussion board more organized.
You can also add additional features to the discussion board, such as the ability to attach files, add images, and embed videos. These features can help to make the discussion board more engaging and make it easier for users to share their ideas.
How to Monitor Sharepoint Discussion Boards?
Monitoring Sharepoint discussion boards is essential to ensure that they are being used effectively. You can use the dashboard feature to view the activity on your discussion board, such as the number of posts and the number of users.
You can also use the moderation feature to monitor conversations and ensure that the discussion board is being used for its intended purpose. You can also use the analytics feature to view detailed reports of the activity on the discussion board. This can help you identify any issues that need to be addressed.
Creating a discussion board in SharePoint is a great way to bring people together and foster collaboration within an organization. With just a few steps, you can quickly and easily create a discussion board that allows people to interact and share ideas. Whether you want to create a general discussion board, or a more specialized one for a specific project or group, SharePoint makes it simple to get started. With the right setup, your discussion board can become an invaluable resource for the members of your organization.


