


How To Create Distribution Lists In Outlook?

Are you looking for an easy way to send emails to multiple recipients in Outlook? Creating distribution lists is a great way to do this. It allows you to add contacts to a single list, and then quickly send emails to everyone on the list with just one click. In this article, we’ll walk you through the steps to create distribution lists in Outlook.
Creating Distribution Lists in Outlook is easy and relatively straightforward. To get started, open Outlook and select the “Contacts” tab. From there, click “New” and then “Distribution List”. Give the list a name and then add contacts to the list by selecting them from your address book. Once the list is populated, click “Save and Close”. To add contacts to the list at any time, open the list, click the “Actions” menu, and then select “Add Members”.
- Step 1: Open Outlook and select the “Contacts” tab.
- Step 2: Click “New” and then “Distribution List”.
- Step 3: Give the list a name and then add contacts to the list.
- Step 4: Click “Save and Close”.
- Step 5: Open the list, click the “Actions” menu, and then select “Add Members”.
Introduction to Distribution Lists in Outlook
Distribution lists are an effective way of quickly sending emails to a specific group of people. They can be used to send emails to a large number of people quickly and easily. They are especially useful when sending emails to multiple people at once, such as when sending out newsletters, announcements, or updates. Outlook makes it easy to create and manage distribution lists, allowing users to quickly and easily send emails to their chosen contacts.
Creating a Distribution List in Outlook
Creating a distribution list in Outlook is relatively straightforward. The first step is to open the Outlook application and select the ‘Contacts’ tab from the navigation bar. You will then need to click on the ‘New Contact Group’ button and enter a name for your distribution list. Once you have done this, you will be taken to a new page where you can add the contacts that you wish to include in the list. To do this, simply click on the ‘Add Members’ button and select the contacts that you wish to include. You can also add additional contacts from other sources such as Outlook’s Global Address List and from external sources, such as Gmail.
Once you have selected all the contacts that you wish to add to the list, click on the ‘Save & Close’ button. This will save the list and you will be able to access it at any time.
Managing a Distribution List in Outlook
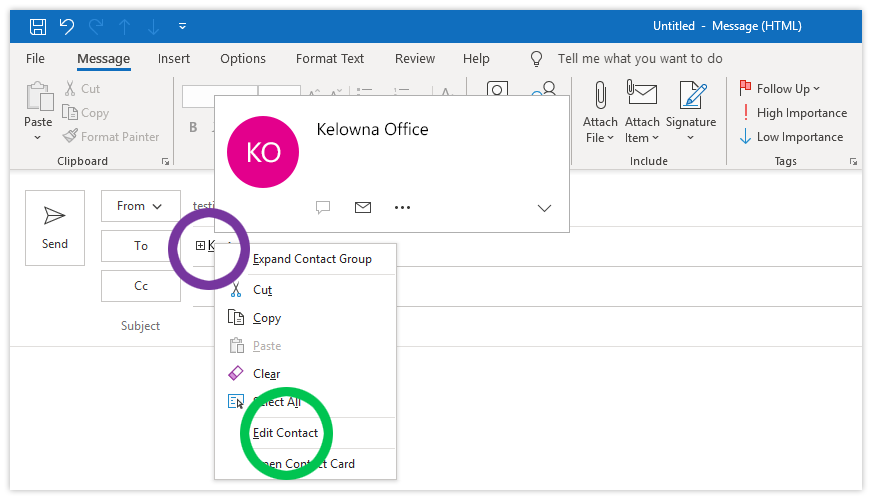
Once you have created a distribution list, you can easily manage it. To do this, open the ‘Contacts’ tab in Outlook and select the list that you wish to manage. On the left-hand side of the page, you will see the ‘Manage’ button. Clicking on this button will open a new page where you can add, delete, or edit the contacts in the list.
To add a new contact to the list, click on the ‘Add Members’ button and select the contact from the list. You can also add contacts from other sources such as Outlook’s Global Address List and from external sources, such as Gmail. To delete a contact from the list, simply click on the ‘Delete’ button next to the contact’s name. You can also edit the contact’s information by clicking on the ‘Edit’ button.
Using a Distribution List in Outlook
Once you have created and managed a distribution list in Outlook, you can start using it. To do this, open the ‘Mail’ tab and click on the ‘New Email’ button. In the ‘To’ field, enter the name of the distribution list that you wish to send the email to and click on the ‘Send’ button. The email will then be sent to all of the contacts in the list.
Organizing Distribution Lists in Outlook
Organizing your distribution lists in Outlook is a great way to keep track of them. To do this, open the ‘Contacts’ tab and click on the ‘Category’ button. You will then be able to create new categories for your distribution lists and assign them to each list. This makes it easier to find and manage your distribution lists.
Sharing Distribution Lists in Outlook
Sharing distribution lists in Outlook is a great way to collaborate with others. To do this, open the ‘Contacts’ tab and click on the ‘Share’ button. On the new page, you can enter the email addresses of the people that you wish to share the list with. You can also set permissions for each person, such as whether they can edit the list, delete contacts, or add new contacts. Once you have done this, click on the ‘Share’ button and the list will be shared with the people you have specified.
Few Frequently Asked Questions
What is a Distribution List?
A distribution list is a collection of email addresses that can be used to send a single message to multiple people. The list can be created in Microsoft Outlook and can be used to send emails to multiple contacts with one click. The list is particularly useful for sending out newsletters or group emails.
What are the Benefits of Creating a Distribution List?
Creating a distribution list in Outlook offers several benefits. It can save you time by allowing you to send out one email to multiple contacts instead of having to manually enter each address. Additionally, it allows you to easily manage a list of contacts, as you can add and remove addresses as needed. Finally, it can be used to organize contacts into different categories (e.g. customers, prospects, etc.).
How do I Create a Distribution List in Outlook?
Creating a distribution list in Outlook is a simple process. First, open the Outlook program and click on the “Contacts” tab. From there, click on the “New” button and select “Distribution List” from the drop-down menu. When prompted, enter a name for the list, then click “Add Members” to begin adding contacts. You can add contacts one at a time or import an existing list from a file. Once you’ve added all the contacts, click “OK” to save the list.
How do I Send an Email to a Distribution List?
Once you’ve created a distribution list in Outlook, you can send an email to the list with just a few clicks. First, click on the “New Email” button. Next, enter the desired recipients in the “To” field, then select the distribution list from the drop-down menu. Finally, enter the subject and message, then click “Send” to send the email.
Can I Modify an Existing Distribution List?
Yes, it’s easy to modify an existing distribution list in Outlook. First, open the Outlook program and click on the “Contacts” tab. From there, select the list you want to modify and click “Edit”. You can then add or remove contacts to the list, as well as change its name. When you’re finished, click “OK” to save your changes.
Can I Create Multiple Distribution Lists?
Yes, you can create multiple distribution lists in Outlook. To do this, simply follow the same steps as above to create a new list. Once you’ve created the new list, you can add contacts to it and manage it as you would any other list.
Creating distribution lists in Outlook is an easy and efficient way to send emails to multiple contacts in one go. With a few clicks, you can save time and energy by managing your contacts in an organized way. Whether you’re a small business owner or a busy professional, having an organized distribution list in Outlook can be a great asset. With these steps, you can ensure that your distribution lists are set up and ready to use in no time.


