


How to Setup a Network Connection in Windows 7?

Are you finding it difficult to connect to a network on your Windows 7 computer? Setting up a network connection can be a daunting task, especially if you’re not familiar with networking. In this article, we will provide you with a step-by-step guide on how to properly setup a network connection in Windows 7. We will also cover the basics of networking so you can better understand the process. So, let’s get started!
Setting up a Network Connection in Windows 7:
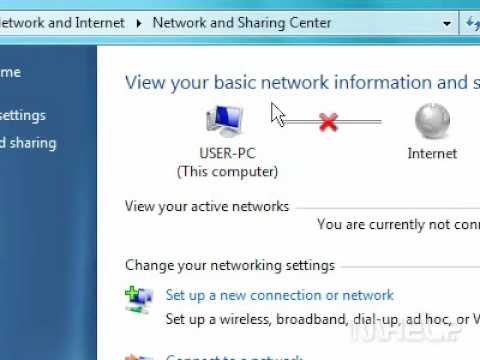
1. Open the Control Panel. Click on Network and Internet, then Network and Sharing Center.
2. Click on Set up a new connection or network.
3. Select Connect to the Internet, then click Next.
4. Select your Internet connection type, then click Next.
5. Enter the information provided by your Internet service provider (ISP) and click Connect.
6. If prompted, enter your username and password for the ISP and click OK.
7. Once the connection is established, click Close.
Configuring a Network Connection on Windows 7
Windows 7 provides users with a variety of options for setting up a network connection. Whether you’re setting up a wireless network connection or a wired network connection, Windows 7 makes it easy to get connected. In this article, we’ll look at how to set up a network connection in Windows 7.
Connecting to a Wireless Network
Connecting to a wireless network is one of the most common ways to set up a network connection. To get started, open the Control Panel, then select the “Network and Internet” category. From there, click on the “Network and Sharing Center” link. In the Network and Sharing Center window, click on the “Set up a new connection or network” link.
In the next window, select the “Manually connect to a wireless network” option. You’ll then be asked to provide the network name, security type, and encryption type. Once you’ve entered the information, click the “Connect” button. If the connection is successful, you’ll get a confirmation message.
Connecting to a Wired Network
Connecting to a wired network is another common way to set up a network connection. To get started, open the Control Panel, then select the “Network and Internet” category. From there, click on the “Network and Sharing Center” link. In the Network and Sharing Center window, click on the “Set up a new connection or network” link.
In the next window, select the “Connect to a workplace” option. You’ll then be asked to provide a username and password. Once you’ve entered the information, click the “Connect” button. If the connection is successful, you’ll get a confirmation message.
Troubleshooting Network Connections
If you’re having trouble connecting to a network, there are a few things you can try. The first thing to do is to make sure that the network is properly configured. Check that the network name, security type, and encryption type are all correctly entered.
If the network is correctly configured, then you may need to update the network drivers. To do this, open the Device Manager, then select the network adapter. Right-click on the adapter and select the “Update Driver Software” option. Follow the on-screen instructions to complete the update process.
Changing Network Settings
If you need to change the settings for a network connection, you can do this from the Network and Sharing Center window. Simply click on the “Change adapter settings” link and then right-click on the connection you want to change. From the right-click menu, select the “Properties” option.
In the Properties window, you can change the settings for the connection. You can also change the network name, security type, and encryption type. Once you’ve made the changes, click the “OK” button to save them.
Verifying Network Connections
Once you’ve set up a network connection, it’s important to verify that the connection is working properly. To do this, open the Control Panel, then select the “Network and Internet” category. From there, click on the “Network and Sharing Center” link.
In the Network and Sharing Center window, click on the “Change adapter settings” link. Right-click on the connection you want to check and select the “Status” option. This will open the Connection Status window, which will show you information about the connection. If the connection is working properly, you should see a “Connected” status.
Top 6 Frequently Asked Questions
What is a Network Connection?
A network connection is a link between two or more computers, allowing them to communicate with each other. In order to make a connection, the computers need to be connected to a network, either through a local area network (LAN) or a wide area network (WAN). The network connection can be wired, such as an Ethernet cable, or wireless, such as Wi-Fi.
How to Setup a Network Connection in Windows 7?
In order to set up a network connection in Windows 7, you will need to open the Control Panel. Here, you will find the Network and Sharing Center. Once you click on this, you can set up your network. You will need to specify the type of network you want to set up (home network, work network, etc.), and then follow the on-screen instructions to complete the setup. You may need to enter any security keys or passwords associated with the network.
What is the Difference Between a Wired and Wireless Network Connection?
The main difference between a wired and a wireless network connection is the way the connection is established. With a wired connection, a physical cable is used to connect the two or more computers. The cable is typically an Ethernet cable, and the connection is established once the cable is plugged in. With a wireless connection, a radio signal is used to transmit data from one device to another. The devices must be within range of each other in order for the connection to be established.
What are the Benefits of Setting Up a Network Connection in Windows 7?
Setting up a network connection in Windows 7 provides many benefits. It allows users to share files and data between computers, access the internet, and even share printers and other devices. Additionally, it can improve the performance of the computers, since they can access resources on the network instead of using their own computers. Finally, it can increase security, since users can set up different levels of access and control who is allowed to access certain resources.
What Network Settings Do I Need to Set Up a Network Connection in Windows 7?
In order to set up a network connection in Windows 7, you will need to configure the following settings: the type of network (home, work, public, etc.), the name of the network (also known as the SSID), the security settings, the type of encryption, and any passwords or security keys associated with the network. Additionally, you will need to configure any advanced settings, such as dynamic IP addressing or static IP addressing.
What are the Potential Issues with Setting Up a Network Connection in Windows 7?
Setting up a network connection in Windows 7 can be a complicated process, and there are several potential issues that can arise. These include incorrect configurations, interference from other wireless networks, outdated drivers, and incompatibilities between different versions of Windows. Additionally, if the security settings are not configured correctly, the network may be vulnerable to malicious attacks. It is important to ensure that all settings are correct and that the network is secure before attempting to connect to it.
How to enable your network connection in Windows 7
Setting up a network connection in Windows 7 is an easy and straightforward process. By following the steps outlined in this article, you can quickly and easily connect to a wired or wireless network and start using the internet right away. With the right tools and information, you can take advantage of the many features and benefits of having a reliable network connection. So what are you waiting for? Get connected and start enjoying the internet today!


